Sunday, September 21, 2008

Don't be slamming these.

When we were working on the design of our house we visited every show home in the lower mainland for ideas. One of our favourites was a new complex on the far tip of Lulu Island, Red Boat. We visited many times as they were a similar size and scale to our house so we were able to confirm how the sizes of our rooms would feel while we were still in the design phase. One plan was almost our exact main-floor plan - very helpful.
The design and finish of these homes is wonderful, quite different from the usual clones being built all over the lower mainland.
One of our favourite features was their use of natural and salvaged materials & real wood, particularly the fir interior doors.

Thanks to Kim's friend Brian & his connections we were able afford to splurge on our own 'stain-grade, vertical-grain' fir doors. They're still waiting to be stained & sealed, but don't they look nice even naked?

Beautiful real-wood doors like that deserve to be dressed up:

I LOVE the design of these handles. They have such a heavy, substantial feel in your hand but look like fine jewellery for your home. (note how the curve of the handle mimics the curve of our window & barrel vault - we have a theme happening here, people)

They're a brushed nickel finish, which is a wonderful warm colour (that doesn't show in this picture) & looks good with the champagne-y colour of our window hardware - and the un-nameable colour of the clear-ish flecks in our granite. (Thanks again to Brian we were able to afford these handles)

I was hoping to buy brushed nickel faucets for, at least, the kitchen & powder room but the tight-wad side of me can't justify the $200.00!!!! price difference between brushed nickel & plain old ordinary polished chrome kitchen faucets. Just for a different colour?!!? Sorry, we've been splurging in too many areas, will have to stick with plain old ordinary for our plumbing fixtures.
Don't want to have everything too matchy-matchy anyway.... Right?

Friday, September 19, 2008

Next.....

The back of our house, over the end of the kitchen/greatroom has a high vaulted ceiling.


This view is taken from the back door looking towards the front of the house. That wall in the centre is a 'shear wall', in case of the big one, and that's where my wall-oven & microwave will be - Jennair's black floating glass (not stainless steel, I'm bucking that trend - I like stainless steel in small doses and only where completely appropriate for function, not fashion - like cooktops & range hoods, definitely NOT fridges)
Last weekend my shiny new oven, microwave, cooktop and range-hood arrived. I hope they don't get lonely waiting in storage, I know I can't wait to be able to use them. If you read about my appliance woes last winter you'll know how exciting this is for me. (See Nov & Dec archives)


So we have this lovely vaulted ceiling, coming to a sharp point in the middle, over this lovely rounded window.
Hmmm, can't have that can we? So, after taking only a 5-day break (that's what the paying job is for isn't it - resting up for busy weekends?) Kim was back at it: (click on pics to see'em big)


Half-way there.


One last piece.

Oh by-the-way, any ideas on how we're going to get insulation in there now?


There, isn't that better? A nice barrel-vault ceiling. Great job Kim!
I love it..... but somehow I think the drywallers won't share my enthusiasm.

Tuesday, September 16, 2008

We're Wired

Too much coffee....

No, not really, not every day, anyway.

It's the house - the rough-in electrical is in.
I knew it was happening soon but didn't realize that 'rough-in' includes actual fixtures for the pot lights so it was a bit of a scramble getting them in time.
I had met with a lighting designer a few months ago so I was prepared (or thought I was) when we did our first walk-through with the electrician. I had made a few adjustments of my own to the designer's plan & then the electrician had some great suggestions to make.
OK I'll confess, when I got home I compared our final plan to the original designer's plan and found they were almost exactly the same. Most of the changes that I had made the electrician had revised - to the way the lighting designer had originally planned, coincidentally.
So much for my delusions of being a lighting designer.
And, it's a good thing we had such a knowledgeable electrician.

When Kim & I checked the placement of all lights & outlets after the first day, before the wire was strung, we found just a few errors. Then sheepishly realized that most of the changes or additions on our list were because of our own mistakes.
In one case we both thought the other had told the electrician about a fairly crucial outlet requirement; in another I had carefully measured & put an X on the floor for placement of our dining room fixture. Then, just to be absolutely sure, I wrote the distances from each of the walls on my taped 'X'. When we did our check that evening I couldn't believe they had put the light 'over there' when the X was obviously 'right here'. Couldn't figure out how they could make such a stupid mistake when they had done such a great job everywhere else - until I looked at the figures I had written on the X - I had the numbers swapped, of course.
They must have noticed their, I mean my, mistake as soon as they walked in the house next morning because it was fixed before I even phoned to tell them about it.

Capital, part 2


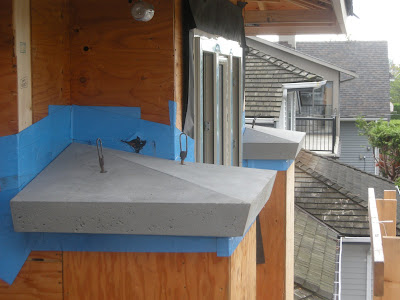
Now that the capitals are unmolded comes the job of getting them installed. Way up here.

But before we hire a crane, there's a lot of work to be done to make sure those 600 pound chunks of concrete don't come crashing down on someone's head. We are in an earthquake zone, you know.

Kim had some heavy pipes made for reinforcement. He and camera-shy Shea worked all weekend installing them and strengthening the upper supports.


He really gets into his work.


Here's the view from just inside the front door, up through the skylight.

Ta-da!
Sorry, no pictures of the crane putting them in place, I was at work & Kim was too busy helping guide them into place to be able to take any pictures.

Monday, September 1, 2008

Capital

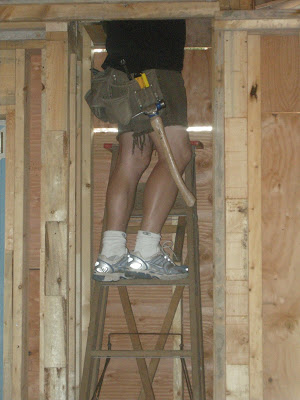
That's an interesting look, Kim. Cowboy Darth?
He tackled a very tricky project to create the finishing touches for the front of our house. Had to do something to stop everyone from asking "what are those two tall box-things in the front?"


Those pink things on top of 'the tall box-things' are styrofoam prototypes for the caps on these columns.
The style we went with is the one hidden behind the tree.

The first finished (or so he thought) mold.
After the concrete expert came & took a look both molds had to undergo substantial re-inforcement. That concrete is pretty heavy, especially when it's wet.
Many hours of work went into designing and building the molds. It's a good thing Kim's labour is free or these capitals would have cost us a fortune.

We're very fortunate to find out that one of the best concrete experts in the province lives just 1/2 a mile from our house and was willing to cast the caps for us. Turns out it isn't something we could have done ourselves, they're so heavy that special equipment was needed to handle them and we don't happen to have a crane or vibration table, or a cement mixer for that matter. This is part of Casper's workshop.

The 'unmolding' was an exciting evening.
Once the concrete had hardened the filled mold had to be turned over.

It took three people and a crane.


Then they went at it, unscrewing the 5 bzillion screws.

Carefully, one piece taken off at a time, like a long, boring strip-tease.

The first reveal. Looks good.


And here they are, unmolded.

The pokey things sticking out are for attaching metal eyes to so they can be picked up and put in place by crane.